By Scott Grundfor
Body Check
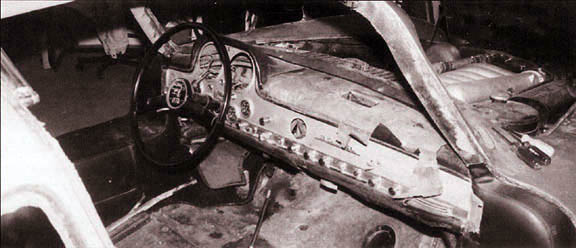
Restoration begins with an analysis of the car, obviously easiest if it runs and is in one piece. By simply walking around a car looking at various parts, you may be able to tell whether or not it is complete and identify missing parts. This allows an assessment of mechanical and cosmetic condition of the parts. Looking at the body, you can judge how well individual panels fit together and how trim moldings line up. Get down and sight along the sides and edges of the body, looking to see how everything fits.
Check to see how the doors, hood, and trunk open and close Check for wear, prior damage, and signs of repair. Check the basics—chassis, body, and engine numbers are helpful when ordering parts, especially since changes were often made within a given year.
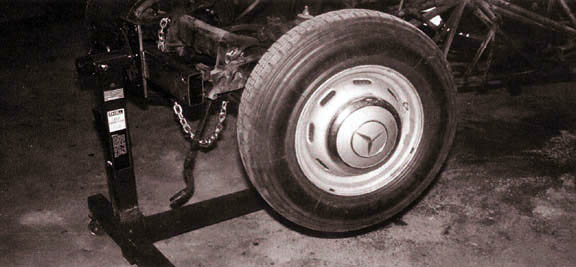
Park the car on a level spot. Looking at it from several angles can reveal problems in suspension or prior collision damage. If the car is not level, springs may be weak or broken. Are all tires the same, correct size? If one tire’s air pressure is low, the car may not appear level. Unusual tire wear can indicate suspension or alignment problems.
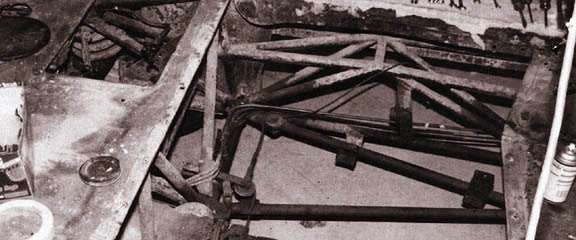
Inspect the front suspension bv jacking up each front wheel and wiggling it to detect worn or loose bearings, bushings, kingpins, ball joints, etc. The suspension should be tight, with little movement. Tie rod ends should be tight. If significant movement exists, try to find what is loose and make a note of it for later attention.
Collision damage under the car may have been repaired improperly, leaving the suspension or even the chassis bent. Do the doors open and close crisply? Do latches fit without excessive wear? Is there excessive door hinge wear? The rubber seals may be old, so you may not get an accurate idea of panel fit, but are gaps between panels even and continuous? Once you disassemble the car, you’ll have a tough time assessing fit, so make notes or photos now.

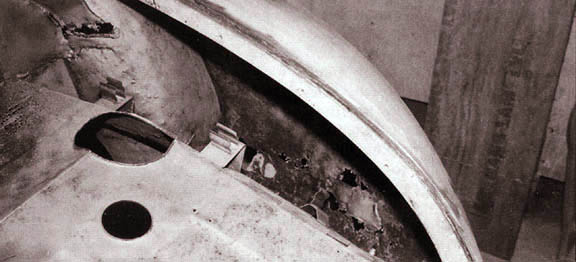
Look for rust. Inspect the lower body for excessive body filler (use a magnet on steel body parts) or signs of rust (typically bubbling, flaking paint). Built-up dirt or leaves can act as a sponge to hold moisture. Look inside the fenders (especially behind the tires and in narrow spaces between panels), inside the trunk, inside the doors (if possible), and anywhere else that moisture can accumulate.
Mechanical Check
Once you take the car apart, you can’t drive it, so determine its mechanical condition while it’s still together and running.
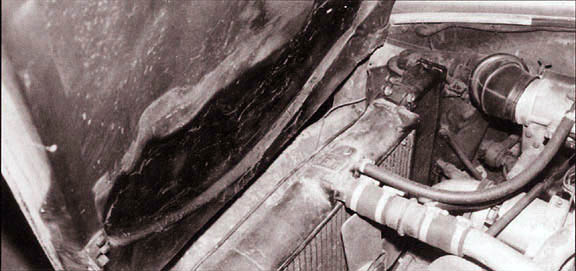
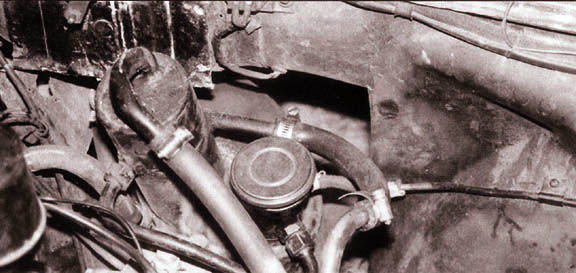
Before you start the engine, check the coolant level. If water has been used in the system, it may have clogged up, or the radiator may be corroded. Old coolant can corrode the cylinder head, allowing water to leak into the cylinders. Look for leaks or rust at the joint between the block and the head. Look for rust stains or other evidence of seepage. Examine the coolant lines, too steel and rubber, as applicable.
Pull the dipstick and look for water in the oil. Beads of water on the dipstick can indicate a cracked block or a leaky head gasket, both requiring disassembly and possibly major repair, even head or block replacement. Conversely, check for oil in the coolant. Oil there will look milky, light brown. Put your finger into the radiator, and if it comes out greasy or really oily, oil may be leaking into the coolant, which can mean a cracked block. If the car has been standing, look for oil beneath it. Look for oil leaks in the engine compartment. Then get underneath. If possible, get the car up on a rack to inspect the brake and fuel lines; look for brake fluid leaks at the wheel cylinders and the master cylinder.
The next step is to get into the car, test its mechanical functions, then drive it to see how it performs. Get in, start the engine, and watch the gauges as it warms up. Pull the emergency brake handle to be sure it works. Turn the steering wheel to check for play. If the wheel is tight, the front suspension (including the tie rods and steering box) is probably in decent shape. If you find excessive play, investigate further.
When you start the engine, look for excessive blow-by. If smoke puffs from the breather line belovv the car, the compression rings may be worn. If exhaust gasses get past the rings into the crankcase, the engine needs new rings. The exhaust can tell you a lot. Bluish smoke can indicate worn oil and/or compression rings or oil being burned in the upper cylinders due to worn valve guides. When first started, a 300SL often puffs black smoke because it has a cold-starting device, but that should go away. Continued sooty, blackish smoke can mean that the fuel mixture is too rich, caused by a worn or maladjusted fuel injection pump. A strong smell of fuel at the exhaust can also indicate a too-rich mixture.
Try the various auxiliary and accessory systems—heater, lights, wipers, instruments, radio, etc. Leave no switch un-pulled. Inspect the interior trim for fit and condition. See that the generator is charging. The 300SL relies on an idiot light. When the red light goes off, the system is charging; if it stays on, it isn’t. See that the engine reaches operating temperature yet doesn’t overheat. Running too cool could mean that the thermostat isn’t operating or installed properly.
Before you drive, make sure the brakes work. Once moving, feel for play, and listen for unusual noises. The 300SL has a mechanical clutch, but in other models with hydraulic units, a sagging clutch can mean hydraulic problems. If rpm rise, but the car doesn’t speed up as you press the throttle, especially in higher gears, that’s a clue to a worn or slipping clutch. Does the clutch release and engage smoothly? Lag, slop, or clunks can indicate wear in the transmission, rear-end, or driveshaft.
Drive in each gear and listen for excessive gear noise (they all make some noise). The synchros should prevent grinding during shifts. Listen for whines at moderate speeds. Clunking at low speed or while decelerating can signify universal joint problems. Vibration with the clutch pushed in can be caused by driveshaft or wheel imbalance.
If the car pulls sideways under braking, the brake drums may be worn badly or unevenly, or a suspension or alignment problem may exist.
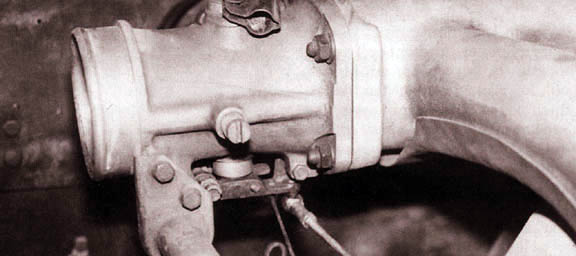
With the engine running, look to see if any pulleys are bent or if any of the accessory drives are out of line. Look for broken or bent fan blades, which cause vibration or wear. Be alert for engine vibrations, at idle or while driving. With the engine off, check for worn motor mounts by trying to shake the engine by hand.
A 300SL’s valve train tends to be noisy. Rocker arms and cams make a sort of light clatter, especially in early cars. Fluctuating oil pressure can indicate engine wear. Excessive bearing clearances or a worn crankshaft or camshaft can cause low oil pressure.
After your drive, open the hood and check again for water (or even steam) leaks. Be careful about opening the radiator cap; the system is under pressure, and you could get a blast of steam.
After a thorough examination of the car, you can gauge the depth of your upcoming restoration. If the car is mechanically sound and drives well, it would seem pointess to disassemble it and rebuild everything. Most restored cars are used infrequently and gently.
Undo It The Right Way
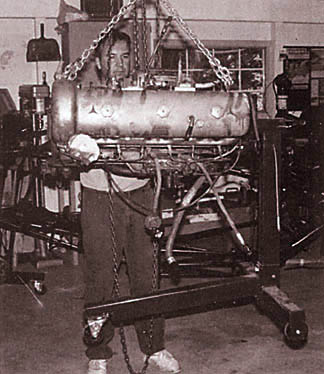
Even though you may be in a hurry, pay careful attention when taking things apart. Shoot lots of detail photos of assemblies and components before you start. Cleaning the car thoroughly will ease disassembly. Take the car to a car wash, then steam clean the engine compartment, undercarriage, and drivetrain.
 Before you start loosening a fastener, vou may have to remove the crud around it with a scraper. Small wire brushes on an electric drill get old paint and dirt out of threads. With a few cans of WD40 or rust remover, give every nut, bolt, and screw a squirt. Do this two or three timcs to loosen the years of accumulated corrosion and dirt. If you try to take off some bolts “dry”, you will either snap studs, strip threads, or mangle the fasteners without getting them off. You can sometimes use a torch to heat a seized nut, which expands the nut, breaking its hold on thc stud. Let it cool a bit, spray on some penetrant, then try to loosen it again. As a last resort, you can try to cut the nut with a hacksaw or drill out the bolt or stud, but undoing things the right way is more elegant and preserves parts.
Make drawings of fasteners and connections that must go back together in the proper order. Organize and group pieces together, cataloging them as they come off the car vvith tags and markers. Keep groups together in boxes or trays— fuel pump, generator, windshield wipers, etc. I find it best to use the groups in the Mercedes-Benz parts books. Use a felt-tip marker on freezer tape or masking tape to identify parts. Store them as soon as you remove them. Coffee cans are great for nuts and bolts, but avoid glass jars; sooner or later you’ll drop one.
If you can, build or buy a simple stand or fixture, called a “rotisserie”, to hold the body at working level and allow you to turn it on its side or even upside down for better access. Built from steel tubing in a few hours, such a stand can save you days of back-breaking work later.